")
If you’ve just unboxed a shiny new iPhone 17, 17 Pro, 17 Pro Max or iPhone Air, you’re not alone. Demand is huge: in China, iPhone sales jumped 22% in the first month after the iPhone 17 launch, with the new lineup making up nearly four‑fifths of Apple’s smartphone sales there. [1] Reviews are praising the A19 Pro chip, triple 48MP cameras and “Apple Intelligence” in iOS 26, especially on the iPhone 17 Pro Max. [2]
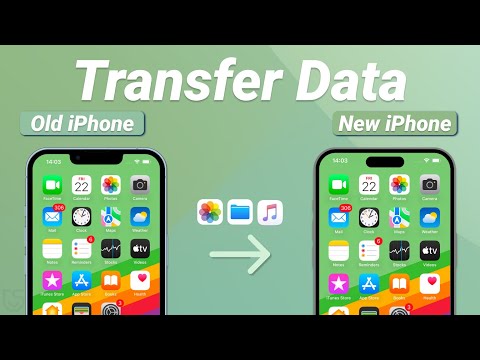
But before you can enjoy any of that, you need to get years of photos, chats, apps and passwords from your old phone onto the new one — safely and completely. That’s exactly what CNET’s guide on “The Best Ways to Transfer Your Old Phone’s Data to a New iPhone 17” focuses on, promising “stress‑free” data migration. [3] Tom’s Guide, Lifewire, Apple and others are all publishing updated how‑tos this fall as millions of people upgrade. [4]
At the same time, today’s iPhone 17 news cycle isn’t just about camera tests and cases. Apple is delaying the next‑gen iPhone Air 2 to 2027, apparently turning the Air line into a testbed for cutting‑edge tech like 2nm chips and foldable features, [5] and power users are still complaining about Wi‑Fi and cellular dropouts on the iPhone 17 series while Apple prepares fixes in iOS 26.1. [6]
So, on 22 November 2025, here’s the up‑to‑date, news‑aware guide to moving everything onto your new iPhone 17 — with practical steps and real‑world troubleshooting for the issues people are actually seeing right now.
iPhone 17 in Today’s Headlines: Why the Transfer Step Is So Critical
Before we get into the step‑by‑step guide, a quick look at what’s happening around the iPhone 17 today:
- Sales momentum – In China, iPhone sales are up 22% year‑over‑year in the first month post‑launch, even while the broader smartphone market shrank. The iPhone 17 family accounts for almost 80% of Apple’s iPhone sales there. [7]
- Big leap in hardware & AI – Reviews like the one from The Times of India describe the iPhone 17 Pro Max as a “big leap” thanks to the A19 Pro chip, triple 48MP cameras and Apple Intelligence baked into iOS 26, with a new aluminum design and better battery life. [8]
- Connectivity drama – A widely shared Economic Times piece details how many iPhone 17 owners are facing dropped calls, missed messages and Wi‑Fi cutouts. Apple support staff are acknowledging the problem, with iOS 26.1 expected to fix much of it. [9]
- Accessory boom – Press releases are already pushing “must‑have” iPhone 17 Air cases, highlighting new, lighter designs that still need solid protection. [10]
- Strategy shift for iPhone Air – A new report today says Apple has pushed the iPhone Air 2 to spring 2027, positioning the Air as a slower‑refresh “experimental” line for new chips and possibly foldable tech. [11]
Put it together and you get a clear picture: the iPhone 17 is a major upgrade with big expectations — and some very real early‑adopter bugs. That’s exactly why how you transfer your data matters: a clean, verified migration makes it much easier to deal with any software patches, connection fixes or device swaps later.
Step 1: Prep Your Old Phone Before You Touch the iPhone 17
Whether you’re coming from another iPhone or from Android, good prep dramatically lowers your risk of problems.
1. Update your old phone’s software
- On iPhone: Settings → General → Software Update → install the latest iOS (ideally iOS 26 or above on supported devices).
- On Android: Settings → System → System update → install the latest version.
This matters because Apple’s official guidance on switching phones — including for the iPhone 17 — assumes you’re on a modern OS that supports Quick Start, modern backups and new security features. [12]
2. Make a fresh backup
iPhone:
- iCloud: Settings → [your name] → iCloud → iCloud Backup → Back Up Now.
- Computer (Mac or Windows): connect your phone, then:
- On Mac: open Finder, select your iPhone in the sidebar.
- On Windows: open the Apple Devices app or iTunes.
- Choose “Encrypt local backup” (important — this preserves passwords, Health data and app logins), then click Back Up Now. [13]
Android:
- Turn on backup in Google One / Google Backup, or use manufacturer tools (Samsung Cloud, etc.).
- If you’re using Move to iOS later, having everything up to date and synced makes the transfer smoother. [14]
3. Clean up & charge up
- Delete huge, obviously junk files (old downloads, 20GB of random screen recordings, etc.).
- Make sure both old and new phones are at 50%+ battery or on power — Apple explicitly recommends this for Quick Start and transfers. [15]
- Close background apps on your old phone; Tenorshare notes that heavy background activity can slow or stall transfers on the iPhone 17. [16]
4. Prepare your 2FA & authenticator apps
Real‑world reports show iPhone 17 upgraders getting locked out of accounts because their authenticator app didn’t fully migrate. One Microsoft support thread from this month describes a user who moved to an iPhone 17 and found Microsoft Authenticator no longer issuing codes for a key Outlook account. [17]
Before you transfer:
- Make sure you can log into critical accounts (email, banking, work apps) via another method — SMS codes, backup codes, or a hardware key.
- If your authenticator app offers cloud backup (e.g. Microsoft Authenticator, Google Authenticator with account sync), double‑check that it’s enabled and up to date.
Step 2: Choose the Best Transfer Method for You
CNET, Tom’s Guide, Macworld and Apple all converge on the same four main ways to get your data onto the iPhone 17. [18]
We’ll walk through each, with pros, cons and mini‑how‑tos.
Method 1: Quick Start iPhone‑to‑iPhone (Best for Most People)
If you already own an iPhone, Quick Start is usually the smoothest and most complete way to move onto iPhone 17 or iPhone Air.
How Quick Start works
When you place your new iPhone 17 next to your old iPhone during setup, you’ll see a prompt to set up the new device. Apple’s official docs recommend Quick Start as step two right after creating a backup. [19]
Steps:
- Turn on your new iPhone 17 and place it near your old iPhone.
- On the old phone, you’ll see a “Set Up New iPhone” prompt. Tap Continue.
- Scan the animation displayed on the new phone using your old phone’s camera.
- When prompted, choose “Transfer from iPhone” (instead of iCloud). [20]
- Keep both devices:
- Plugged into power.
- On the same Wi‑Fi or connected via cable.
- Next to each other and untouched until the transfer finishes.
Wired vs wireless Quick Start on iPhone 17
Tom’s Guide, CNET and Apple all note that wired Quick Start can be faster and more reliable — especially now that the iPhone 17 line uses USB‑C. [21]
- Wired: Use a USB‑C–to–USB‑C cable, or Lightning‑to–USB‑C adapter for older phones.
- Best if you have lots of photos & videos or slower home Wi‑Fi.
- Wireless: Fine for smaller data sets and strong Wi‑Fi, but can be vulnerable to the current Wi‑Fi dropouts some iPhone 17 owners are seeing. [22]
Good to know: If Quick Start seems stuck on “Preparing to transfer”, Tenorshare’s iPhone 17 troubleshooting guide suggests restarting both devices, ensuring strong Wi‑Fi, resetting network settings, or falling back to iCloud or computer backup. [23]
Method 2: Restore from iCloud Backup
If you’ve been diligently letting your old iPhone back up to iCloud, restoring that backup to your iPhone 17 is convenient — especially if your old phone is no longer physically with you.
When iCloud is a good choice
- Your old iPhone is lost, broken or already traded in — but you still have an iCloud backup.
- Your internet connection is fast and stable.
- You don’t need every app login carried over automatically (some logins will need to be re‑entered).
Tom’s Guide’s iPhone 17 guide highlights iCloud restore as one of the four primary options, noting it’s simple and mostly hands‑off once started. [24]
How to restore to iPhone 17 from iCloud
- Turn on your iPhone 17 and follow the onscreen steps until you reach Apps & Data.
- Choose “Restore from iCloud Backup.”
- Sign in with the same Apple ID you used on the old iPhone.
- Pick your most recent backup (ideally one you just made). [25]
- Wait while:
- Core settings & messages come down first.
- Apps, photos and media continue installing in the background.
Tip: Make this easier on yourself by connecting the iPhone 17 to Wi‑Fi and leaving it plugged in overnight. You can still lightly use the phone while apps finish downloading.
Method 3: Encrypted Computer Backup (Mac or Windows)
If you want your iPhone 17 to feel as close to a pixel‑perfect clone of your old phone as possible — with logins and Health data intact — an encrypted local backup is the professional way to go.
Tom’s Guide calls this method out specifically because it preserves app logins and other sensitive data that iCloud doesn’t always carry over. [26]
Step A: Create an encrypted backup of your old iPhone
- Connect your old iPhone to your Mac or Windows PC.
- On Mac: Open Finder, select your device in the sidebar.
On Windows: Open Apple Devices or iTunes. - Under Backups, tick “Encrypt local backup” and set a password you won’t forget.
- Click “Back Up Now.”
This encrypted backup includes:
- Health data
- Wi‑Fi settings
- Website and app passwords
- Some app‑specific data that plain backups may skip [27]
Step B: Restore that backup to your iPhone 17
- Turn on your iPhone 17 and go through the initial setup until it asks how to transfer data.
- Choose “From Mac or PC.”
- Connect the iPhone 17 to the same computer using a cable.
- In Finder or iTunes, select “Restore Backup…”, then pick your encrypted backup.
- Enter the backup password when prompted.
When it’s done, your new iPhone 17 will feel almost identical to your old phone — but with all the benefits of the new hardware and iOS 26.
Method 4: Move to iOS (for Android → iPhone 17)
If you’re jumping ship from Android to iPhone 17, Apple’s Move to iOS app is still the main official path. Both Tom’s Guide and Lifewire continue to recommend it for full‑scale moves. [28]
What Move to iOS can transfer
From most Android phones, the app can move:
- Contacts
- SMS and message history (up to a limit)
- Photos and videos in your local library
- Calendars
- Some app data and free apps that exist on iOS
It won’t move:
- DRM‑protected content
- Some locally stored music
- Random files tucked away in folders
How to use Move to iOS with iPhone 17
- On your Android phone, download Move to iOS from the Google Play Store.
- Turn on your iPhone 17 and begin setup.
- On the Apps & Data screen, choose “Move Data from Android.”
- On Android, open Move to iOS, tap Continue, and agree to the terms.
- Enter the security code shown on your iPhone 17 into the Android app.
- Choose what you want to move and start the transfer.
- Keep both devices:
- Connected to the same Wi‑Fi or tethered via USB‑C,
- Plugged into power,
- Close together until the transfer completes. [29]
Once finished, the iPhone 17 will recreate your home screens and install compatible apps automatically where possible.
Step 3: Troubleshooting Real‑World iPhone 17 Transfer Problems
Because the iPhone 17 line is still new — and iOS 26 is a big update — a lot of early owners are hitting snags during migration. Here are the ones turning up most often right now, plus what the latest guides and support threads suggest.
Problem 1: “Preparing to transfer” on iPhone 17 takes forever or gets stuck
Tenorshare has a whole guide dedicated to iPhone 17 stuck on “Preparing to transfer”, listing the most common causes: huge photo libraries, flaky Wi‑Fi, old iOS versions, devices too far apart or low battery. [30]
Fix strategies:
- Restart both devices (classic but works often).
- Ensure both phones are:
- On the latest iOS.
- Charged or plugged in.
- Right next to each other. [31]
- Move closer to your router or switch to 5 GHz (or 6 GHz) Wi‑Fi.
- If Wi‑Fi is clearly unstable, connect the phones with a cable and re‑run Quick Start.
- If the issue persists, abandon Quick Start and instead:
- Create a fresh encrypted computer backup and restore that, or
- Use iCloud restore.
Problem 2: Wi‑Fi & cellular dropping during transfer
User reports and news coverage tie some of the iPhone 17’s connectivity issues to Apple’s new in‑house N1 wireless chip and early versions of iOS 26. [32] Apple hasn’t published a formal technical explanation, but the current evidence suggests:
- Some users see Wi‑Fi disconnect moments after unlocking the phone.
- Others report intermittent Wi‑Fi and cellular dropouts, often fixed temporarily by toggling Wi‑Fi or resetting network settings. [33]
Workarounds for transfers:
- Prefer wired transfers (Quick Start with a cable, or computer backup) if you know your Wi‑Fi is flaky.
- If you must use Wi‑Fi:
- Sit close to the router.
- Temporarily disable VPN profiles; one MacRumors user fixed persistent Wi‑Fi issues by deleting and reinstalling their VPN app. [34]
- Pause other big downloads/streams on your network.
- If you’re already on an iPhone 17, check for iOS 26.1 updates — users on early betas say the connectivity bug is largely resolved there. [35]
Problem 3: Authenticator apps & 2FA not working after the move
The Microsoft community thread about an iPhone 17 owner who lost access to an Outlook account after Authenticator didn’t fully transfer is a warning: don’t assume authenticator codes will just appear on the new phone. [36]
Before migrating:
- Enable cloud backup or account sync inside the authenticator app.
- Generate backup codes for critical services and store them safely (password manager, printed, etc.).
After migrating:
- Test logging into at least one sensitive account (email, bank) while you still have the old phone powered on and reachable.
- If a specific app didn’t transfer its configuration, use those backup codes to re‑link the authenticator on your iPhone 17.
Step 4: Don’t Forget to Wipe & Deregister the Old Phone
Once you’re sure everything you care about is on the iPhone 17, it’s time to safely retire or sell your old device.
Apple’s official checklist for preparing an iPhone or iPad for sale or trade‑in looks like this: [37]
- Confirm your backup is up to date.
- Transfer your information to the new device (Quick Start, iCloud, computer, or Move to iOS).
- Sign out of iCloud, iTunes and the App Store on the old device.
- If you use Apple Watch, unpair it from the old phone.
- Turn off Find My on the old device if prompted.
- Go to Settings → General → Transfer or Reset [Device] → Erase All Content and Settings.
- Remove the SIM (if any) and take the phone off your list of trusted devices.
If you’re trading in an Android phone to Apple, the same basic ideas apply: back it up, sign out of your accounts, erase the device and remove SIM and memory cards. [38]
Quick FAQ for New iPhone 17 Owners (Late 2025)
How long does it take to transfer data to an iPhone 17?
It depends mainly on how much data you have and your method:
- Wired Quick Start or encrypted computer restore is usually the fastest.
- iCloud restore and wireless Quick Start can take a lot longer, especially with huge photo libraries or slow Wi‑Fi. Tenorshare notes that large photo/video collections can make transfers appear “stuck” when they’re just churning through files. [39]
Which method is safest?
All four official methods (Quick Start, iCloud, encrypted computer backup, Move to iOS) are secure when used correctly. For the most complete clone with logins intact, encrypted computer backup is hard to beat. [40]
Should I set up my iPhone 17 as “new” instead of restoring?
If you’ve had weird bugs for years, or just want a clean start, you can set the iPhone 17 up as a new device and move only essentials (contacts, photos) manually or via cloud services. Lifewire suggests this approach when switching from very old or heavily customized devices. [41]
Do the iPhone 17 connectivity issues affect transfers?
They can. News reports and user threads describe intermittent Wi‑Fi and cellular issues on early iOS 26 builds for the iPhone 17 series, likely tied to Apple’s new N1 wireless chip and the big software update. [42] If your transfer keeps failing on Wi‑Fi, use a cable or computer backup and check for iOS 26.1 updates before trying again.
Final Thoughts
On 22 November 2025 the story of the iPhone 17 is still being written: booming sales in key markets, glowing reviews of the Pro models, a growing accessory market — and yes, a few early‑adopter headaches with connectivity and setup. [43]
The good news is that data transfer doesn’t have to be one of those headaches:
- Use Quick Start if you’re coming from another iPhone and can keep both phones nearby.
- Use iCloud or an encrypted computer backup if you want a near‑perfect clone.
- Use Move to iOS if you’re switching from Android.
- And always back up, test critical apps (especially 2FA), and only wipe your old phone once you’re sure everything made it across.
Follow those steps and your most stressful moment with the iPhone 17 will be choosing a case — not wondering where your photos and chats disappeared to.
References
1. www.reuters.com, 2. timesofindia.indiatimes.com, 3. www.pinterest.com, 4. www.tomsguide.com, 5. www.qoo10.co.id, 6. m.economictimes.com, 7. www.reuters.com, 8. timesofindia.indiatimes.com, 9. m.economictimes.com, 10. www.digitaljournal.com, 11. www.qoo10.co.id, 12. support.apple.com, 13. www.tomsguide.com, 14. www.lifewire.com, 15. support.apple.com, 16. www.tenorshare.com, 17. learn.microsoft.com, 18. www.pinterest.com, 19. support.apple.com, 20. www.tomsguide.com, 21. www.tomsguide.com, 22. m.economictimes.com, 23. www.tenorshare.com, 24. www.tomsguide.com, 25. www.tomsguide.com, 26. www.tomsguide.com, 27. www.tomsguide.com, 28. www.tomsguide.com, 29. www.tomsguide.com, 30. www.tenorshare.com, 31. www.tenorshare.com, 32. m.economictimes.com, 33. forums.macrumors.com, 34. forums.macrumors.com, 35. m.economictimes.com, 36. learn.microsoft.com, 37. support.apple.com, 38. support.apple.com, 39. www.tenorshare.com, 40. www.tomsguide.com, 41. www.lifewire.com, 42. m.economictimes.com, 43. www.reuters.com